Friday, December 14, 2012

A Bag For Izzy

Pssst...did you notice my little snail (above) is slowly moving along?


This is another quick Christmas gift for little Izzy.  The pattern and tutorial are from the FREE Craftsy.com course. I love sewing for little ones. They usually aren't very fussy and appreciate handmade things. I always tried to convince my own children that handmade was better because mama puts love into them and the stores don't. All of the fabric for this project was already in my sewing room. I love shopping the stash, trying to see what fabrics and colors will work together.


Obviously the focal fabric was the 1/2 yard of Boyd's Bears print. I fussy cut it to best show off the teddy bears. I went with a vintage piece of cotton floral for the lining because the blues and pinks matched the colors in the bear print. I nixed the small solids, above, in favor of a solid pink cotton/poly blend.


I had planned to use my Singer monogram attachment to write out the name but it is on the fritz. I had to hand embroider it, instead. I think it turned out better, actually. Here is the bag with the lining attached.


After the lining was poked down inside the bag the top edge was stitched and some channels added for the drawstring.


The drawstrings were an absolute booger to make. I had to switch needles 3 times because they were bouncing off the poly blend fabric and refusing to form stitches. I finally switched to a ball top needle and had better success (but still not very good). Once I had the drawstrings sewn it was another PITA to get them turned right-side-out. I persevered and finally got the job done. You wouldn't think such an easy little bag would give me such fits.

Tuesday, December 11, 2012

A Very Happy Cat

I can cross another gift off my "must sew" list. I started this cat yesterday morning and finished it up this afternoon. I had to wait for the pieces to dry after I washed out the blue marker. The most time consuming part was the embroidery. It was slow going. I hadn't embroidered anything in a long, long time. I had to break out my Reader's Digest Complete Guide to Needlework to refresh my memory. That is an awesome reference book, BTW. Here is my finished cat, followed by my step-by-step how to. If you'd like to sew a Happy Cat of your own, here's where I got the pattern.


The first step is to print out the pattern and directions. My computer was not cooperating. I had to open each pattern piece in a new window and print it from there. Once the pieces are printed you have to tape them together. I trimmed off all the extra paper bits to make the pattern easier to trace. I also went over the cat's features with a Sharpie so they would show through the fabric. I don't have a light box. Instead I used painters tape to stick the pattern to a window.


The features were traced with a water soluble marker.

Then the most important part, giving the cat a personality.

The nose is a piece of gray fleece.
I used a blanket stitch to sew it on.

Before sewing the front and back together I applied  fray check to all the embroidery knots. I sewed the cat together with 1/4" seams, using a narrow zig zag, and went very s-l-o-w-l-y as the tutorial recommended. I left the bottom of the cat open for stuffing. I stuffed it very firmly taking special care to make sure enough stuffing was packed into the arms and legs. The bottom opening was hand sewn closed.


The last step was to give the cat some toes and make sure to apply fray check to those knots, as well. All that remains is to wrap it and place it under the tree. I hope little Izzy likes it.

Friday, December 7, 2012

Addictive Towels & Android Annie

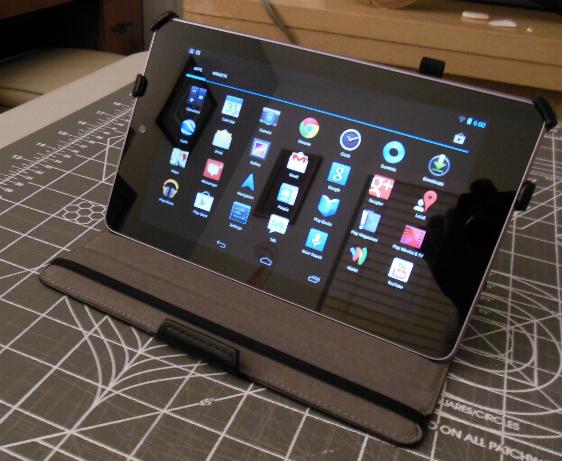
Christmas has come early for me. Meet my new toy, Android Annie. I'm sure she will be my new best friend but right now I am completely befuddled by her.


I am behind the times, having never even had a smart phone. This is way over my head. Won't this be cool to prop up next to my sewing machine so I can watch my online sewing courses? That's how you lure me into using modern technology. Craftsy, here I come!

Meanwhile I have become quite addicted to making these silly hanging towels. I made 2 sets yesterday. First this wine themed pair for my own kitchen....


....and a coffee themed set for a gift.


Now that I had 3 sets completed it was time to dig out a buttonhole attachment and get the buttonholes and buttons put on them. I have been sewing these towels on my Kenmore 1802 but had never attempted to use it to make buttonholes. It was high time. I dug around in my sewing accessories until I found the attachment that is shown in the 1802's manual. It is this funny shaped one piece jobber. Kind of looks like a pizza slicer.


It is super easy to use. You change out the slide plate cover and replace it with one that has a little pinion gear on top. Then drop the feed dogs by pushing a button on the front of the machine. The buttonholer attaches behind the pressure foot with a screw. Then you select the size of buttonhole produced by rotating the selector wheel and swing the buttonholer under the pressure foot and place the wheel over the gear. Almost as easy as those built in 4 step buttonholes but these look much nicer.


These old Kenmores are such a bargain. Unfortunately they are usually missing many, if not all, of their attachments when you find them used. I had to search for the correct slide plate pinion gear and the buttonhole attachment (which I found in 2 separate places) but it was well worth the effort. If you know what you are looking for, they are out there. I also have a fancy monogrammer for the 1802 but have not had a chance to play with it yet. Stay tuned.

Tuesday, December 4, 2012

Hanging Hand Towels

These turned out so nice, makes me wish I'd used better quality towels. However it was the three Dollar Tree towels that gave me the inspiration in the first place. I was there to pick up some $1 tape measures to use in making "snap shut" bags as shown in this tutorial (I guess I need some duct tape, too). Here are my first set of hanging towels. I still have to put in the buttonholes and sew on the buttons, but you get the idea.


I made them a little different than was shown in the tutorial. I didn't have quite enough of the produce print fabric to cut out all the patterns pieces. 

I opted not to tape the 2 pattern pieces together but to cut the fabric pieces and sew them together with 1/2" seams. This allowed me to use a plain green on the backside.


I also chose to use fusible interfacing instead of fleece. This added some stability without adding a lot of bulk. Besides, I have a bunch of old interfacing that's probably been around since the 70's. I need to use it up.


The finished tops. First the front and then the back. I used a 3/4" seam at the opening because I wanted as much of the cute fabric to show as possible.


Now to insert the half towel. First I added some pleats so the top measures 6" wide. I pinned the pleats in place and secured them with 2 rows of basting stitches.


Now for the fun part. I inserted the pleated towel into the hanging top so that the basting stitches didn't show. I then edge stitched all around the topper which secured the towel in place. To make it extra strong I also used a decorative cam to sew some satin stitch diamonds a little ways from where the towel was inserted into the topper opening. I wanted to be sure that towel wasn't going to be pulled out while folks are drying their hands. The bow was an afterthought. I am sewing these on my vintage Kenmore because I want to take my Bernina in for a tune-up. Unfortunately my Kenmore seems to have a mind of its own as far as stitch length and width are concerned. The diamonds were an inconsistent size. The bows are meant to distract you from that fact. Is it working? The final picture shows the back. The green fabric helped stretch the pretty print.


I used cherry red thread for the edge stitching and will be using matching red buttons. Everything was from my stash except the $1 towel. Not bad for a quick and thrifty Christmas gift. Now to make the other 2 sets.

Monday, December 3, 2012

Handmade Christmas

I want to sew most of my Christmas gifts this year. That's my plan. We'll see how far I get. I'm going to start with a few smaller items and work my way up to the more involved projects. First up are some hanging towels made using this tutorial. My goal this year is to create nice, useful, thoughtful gifts using fabrics from my burgeoning stash. These towels were store bought but the hanging tops will use some fat quarters that I already own (the wine themed towels are for my kitchen). I will also use buttons that I have in my collection.


Towel patterns and directions.

I'm not sure how well the prints will show up with the towels folded like that. We shall see. Next on my list, this adorable stuffed cat for a little girl in my life. Ever since I stumbled across that web site I've been wanting to sew one of these joyous felines. I thought I had some pink fleece in my stash but it turned out to be this odd knit fabric. I think it may be a type of double knit fleece? It has very little stretch to it. I think it will be perfect for this toy and should wear better than the polar fleece does.


The front side is fluffy and the back is a knit. Here are the pattern and instructions all ready to go.


I had a devil of a time getting the pattern to print. I ended up having to open each pattern piece in a separate window and print them that way. My last little gift idea for today is this coin purse.I can use up small pieces of cute fabrics and also use some of my sewing machines' fancy design cams. Win-win! I found the metal purse frames at JoAnn Fabrics.


While at JoAnn's I also picked up some more of that fusible fleece (for bags) and some rip-stop nylon for rub out mats. I'll post the finished items as I get them done. Stay tuned!


Sunday, December 2, 2012

Pipe Bag Is Finshed!

Today was a much better day for sewing. I don't think I made any mistakes. I cruised right through and completed my new girly pipe bag. So pretty! I can't wait to tote it to this month's pipe club meeting. Now to make some matching drawstring bags for my pipes.


Saturday, December 1, 2012

A Girly Pipe Bag?

Wow. It's December already. Every year it sneaks up on me. I've got a LOT of sewing to do this month but I won't be able to show most of it off until after December 25th. I don't want the kids peeking. My sewing skills are a bit rusty since I haven't been sewing in over a month. I'm going to get them limbered up by working on a quick project for me. I've been thinking about making a feminine pipe bag for a while now. I have a couple of really fancy leather bags but it would be nice to have something both pretty and washable. When I saw the Craftsy.com Bucket Bag I thought, ah ha! This will be perfect for toting to pipe club. I can put a few pipes and my accessories around the outside and tins of tobacco in the middle. The Bucket Bag and Drawstring Bag are FREE Craftsy classes. Did I mention I love Craftsy? Here are the fabrics I pulled from my stash for this project. The only thing I had to buy was the solid green cotton. That will be the outer body of the bag and the handle. The purple oriental print will be the outer pocket and the 2-tone print will be the bag lining. There is also some dark green fleece for coordinating pipe bags. The plan is to make the bucket bag, 3 drawstring pipe bags, a rub-out mat and a zippered accessory bag. All before next pipe club.


The husbeast worked a double shift last night which meant he slept most of the day. While he snored, I sewed. Or attempted to. Maybe I am destracted or something, but I have been making stupid sewing mistakes all day. It didn't help that I had never used my Deluxe Monogrammer before. I really, really wanted to monogram this bag. I love the monograms that have the large letter in the center, for the last name, with smaller letters to each side for the first and middle names. Luckily I have 2 Singer monogramers and each makes different sized letters.


First things first, figure out how to use the deluxe monogrammer so I can make the "W". Turns out it was very simple to operate.


The sample was made with off white cotton thread but I wasn't happy with the color. It was too light. I did have the perfect color but it was rather ancient silk thread. I don't know exactly how old it is but I think I found it in the drawer of one of my treadle sewing machines. You'll notice it is on a wooden spool.


Old thread can be weak but I decided to chance it. The color and sheen were so pretty. I think it turned out well.


The small "R" and "L" were made with the non-deluxe monogrammer. I applied the fusible fleece to the back of that piece and set about installing the pocket. I took great pains to measure where the pocket channels would be. I opted for the 3 pipe pockets to be on the back of the bag, opposite the monograms. The front pockets will hold the mat and bag. I carefully sewed the pocket to the bag front. As I was clipping the threads and admiring my handiwork it suddenly dawned on me. I had neglected to fuse the interfacing inside the pocket. Oh well, I'm not ripping it apart. It will just have to do. I doubt the Pellon police will come after me.


I think I am going to exit the sewing room for tonight and try again tomorrow. This just isn't a good day for me to sew. Oh, but I did get to use one of my Black Friday weekend bargains. I pressed the bag seam on that little sleeve sized ironing board.