Wednesday, July 31, 2013

Thundercloud Wine?


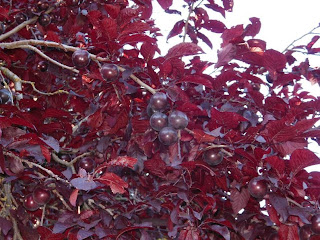
Our street is lined with Thundercloud plum trees. Some of them even bear fruit. My next door neighbor's tree is a heavy fruit bearer. Each year the neighborhood kids congregate to pick most of the low hanging plums....usually long before they are ripe. However this year they missed one large area.


I asked my neighbor if it would be OK if I pick them and attempt to make some wine. He doesn't do anything with them so was happy to oblige. I have a huge container of generic honey that I need to use up. I prefer my bees' honey for eating but this generic stuff is fine for mead making. For those who don't know mead is wine made from honey instead of sugar. And melomel is a fruit mead. Here is the recipe I am using, in case anyone else has access to Thundercloud plums. I can't promise the wine will be any good, though, as this is my first attempt at this wine flavor.

Thundercloud Plum Melomel

· 4# pitted plums (about 5# unpitted)
· 2 # honey
· 1/2 tsp. acid blend
· 1/2 tsp. pectic enzyme
· 1 tsp. nutrient
· 1 campden tablet, crushed
· package wine yeast (or 1/4 tsp in starter)

Wine begun 7-30-13.

Step 1: Pick and wash plums. Break them open with your fingers. Don't remove pits yet. Place into a must bag. Squeeze out as much juice as you can into the primary fermenter. This will also free up the pits. Remove pits from must bag.


Step 2: Add all remaining ingredients except the yeast. Add enough water to make one gallon. Make sure to allow for the weight of the must bag.


Step 3: Take the specific gravity. You are aiming for a beginning SG of 1.090. Mine was spot on.
Step 4: Top with a kitchen towel or cotton cloth and secure with a rubber band. Let sit for 24 hours. This gives the campden tablet time to kill off any wild yeasts that were present on the plum skins, and then gas off. You don't want it to kill your wine yeast.


Meanwhile prepare a yeast starter.
Yeast starter: 1/4 cup warm water, 1 tsp. sugar, 1/4 tsp. wine yeast, 1/4 tsp. yeast nutrient. Cover loosely and let sit until ready to pitch. This will give your yeast a big head start.


Step 5: After 24 hours pitch the yeast into the juice mixture and replace the cloth cover.
Step 6: Stir daily and squeeze juice from the bag. On the 3rd day check the SG. if it is 1.040 or above, rack to the secondary fermenter and attach airlock. While in the secondary it is important to keep the wine out of the light. Cover it with a thick towel or store it in a dark cupboard or closet.
Step 7: Rack again in 3 to 4 weeks. Then rack every 2 months, as needed, until there is no more sediment.

If you don't rack this often, nothing bad will happen. It's best not to have the wine sit on the lees (sediment) for too long but wine does OK if you ignore it. Just check the airlock often and replace the liquid (water or sanitizer) if it gets low.

Step 8: Bottle. I usually keep my wine in the secondary for 9 to 12 months before bottling.

I like to back sweeten my fruit wines at bottling. I add a cup of sugar (or honey) per gallon of wine, give or take. Dissolve the honey or sugar in water before adding. If you sweeten your wine you will also need to add a stabilizer or it might begin fermenting again and you'll have a mess when the corks pop or the bottles explode. Add 1/2 tsp. of stabilizer when you sweeten, then bottle. 

Monday, July 22, 2013

It Fits!

And it is very comfortable. This picture is for you, Pearl.


Thursday, July 18, 2013

A Couple of Last Minute Details

I thought I was done but not quite. Today I added some French tacks to the inside, to anchor the lining to the shirt bottom. Now it won't end up bunched under my arm pits.


I also added one of my exclusive labels. LOL!

Today I also returned to Jo-Ann's to pick up more of the metallic embroidery thread. While there I couldn't resist grabbing one of the Jo-Ann's 70th Anniversary Bags. How cute is this!?!! I'm a sucker for vintage sewing machines and fashions.


All Finished With My Crazy HIppie Shirt

Ta Da!


That was a fun distraction. And it fits! I plan to wear it to breakfast at Shakabrah tomorrow. They have the best breakfast in Tacoma. We go there at least once a week.

Yesterday I knuckled under, ignored everything else, and finished the top. The sleeves have the same seam as the tunic sides, as well as matching decorative hem.


This shows what the reverse side of the decorative stitching looks like. I used a white polyester thread in the bobbin.


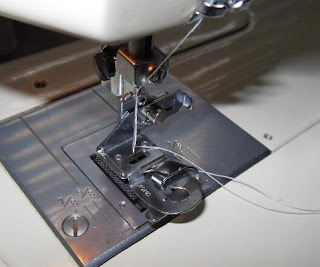
A close ip of the Kenmore 1914 sewing the decorative stitches.

The baby seam I used on the lining.

That seam is only 1/8" wide. It is a bit bulky, though, which I found out while hemming (see below). I learned this technique in a book I found at Half Price Books when they sent me some coupons.


Baby seams are found on page 18 & 19. The technique comes from designer Bill Travilla who is probably most famous for designing Marilyn Monroe's iconic halter dress for that scene in the 'Seven Year Itch'. For the narrow hem I used the model 1914 and a hem stitch foot.


 I started practising with a 3/8" foot but switched to a 1/4".There is a bit of a learning curve. I still haven't quite mastered it but I know that "in theory" it makes hemming easier. I had to spend extra time fixing my hemming boo-boos. And I learned that the baby seams are too fat to fit through the hemmer. But all in all I liked the result.


I basted the lining to the top, wrong sides together, and treated them like one faric from the armholes up.


The sleeves took a bit of easing. The sleeve caps were way too big for the holes and the notches didn't match up. Not even close. But I made it work. Here is a close up of the neckline featuring my home made bias tape.


It was a fun project and I learned a lot. The top is very comfortable and I know I'll be making many more of this design.

Tuesday, July 16, 2013

Moving Right Along

Yesterday I sewed the side seams and hemmed the new top. First the hem. This pattern calls for a 1 1/4" hem, with the 1/4" turned under and the edge top stitched. I am going to use a decorative stitch along the hem so opted to save steps (and thread) and use some "Stitch Witchery" to secure the hem. It also adds stability to that area for the decorative stitching.


It turned out to be a much better stabilizer than the one I used around the neckline. My decorative stitches at the hemline are nice and crisp. I am finding the metallic thread to be rather temperamental. It breaks easily, and did so 3 times across the front hem and once along the back. I am getting very proficient at figuring out how to match up the design when restarting. You really can't tell where the breaks happened. Next up, the side seams. Again, this is a very thin woven fabric. I need strong seams. I also need to finish the raw edges so they don't ravel. The bottom of the hem has side slits, too. Hmmmm....I had an idea in my head of the type of seam I wanted but could not find it listed in my sewing books so am not sure what this type of seam is called. If you know, please leave a comment. What I did was to turn the seam allowance over, in half, on the inside and then top stitch 1/4" away from the seam on either side. I continued this seam down along both side slits. I think it adds a nice design element while making strong, tidy seams.

right side

wrong side

Today I will tackle the lining. I want the lining to stop just before the side slits and have a very narrow hem. I believe I have some special feet designed specifically for that purpose. I am also going to attempt a "new to me" seam, called a baby seam, which is very narrow and great for thin fabrics.

Monday, July 15, 2013

A Summer Sewing Project

I apologize for not posting very much this summer. Beekeeping has been keeping me very busy. I started the season with 2 hives. One was sick and I wound up losing that queen. Then my strong hive swarmed. First to a spot high up in my next door neighbor's chestnut tree, then they moved across the street to a lower tree and I was able to capture them. Now I have 3 hives. The hive that threw the swarm also wound up queen-less so I have purchased 2 new queens this year. The hives are back on track but for some reason they are not taking to the new shallow supers or the yellow rite cell foundation.

Now that the bees have settled down I can turn my attention back to sewing. I don't have the concentration for an involved project but I would like to make some easy, cool clothing items for the summer. This prompted me to look through my stash and I found this fun piece of cotton that I had picked up at Jo-Ann's during one of the "50% off the clearance fabric" sales. I took all they had left, which was only 1.75 yards. The colors are teal green and blue. The fabrics is sort of tie dye/batik/camo-ish.


I looked through my patterns and found one for a pullover t-shirt top that only requires 1.75 yards. Perfect. It is Butterick 3383 and I am making view E. Scoop neck, 3/4 sleeves....not even any darts. I was worried about it fitting since there was no zipper or buttons and no shaping to speak of. I made a small muslin, just the front and back, to slightly below the armholes (no sleeves), and tried it on. The only modifications I made to the pattern were to move the shoulder seams back 1/2" at the neck edge, shorten the sleeves 2" and grade the pattern from an 18 at the top, to a 16 at the hem. The pattern just barely fit on the fabric. There was no way to try and manipulate what part of the fabric design would end up where. That is the front piece in the photo, above. I am glad those big light rectangles ended up where they did. It could have been much worse. The machine in that same picture is my Kenmore 1914. Probably the nicest machine Sears ever sold. I found mine for $20. I had to drive all the way to Whidbey Island to fetch it, and it had been badly abused. But it came with every single attachment including the monogrammer, buttonholer, design cams...etc...It needed a bit more help than I could give it, so I paid our local "old sewing machine guy" $50 to give it a thorough going over and a new belt. A $70 total investment for a machine that usually sells for $200 or more. Yes, I am really happy with that purchase.

Back to the tunic project. Since this is a very easy pattern I decided to spice it up a bit and experiment with some techniques I'd been meaning to try. This top calls for a bias tape facing around the neckline. The colors of bias tape available at the fabric store is extremely limited. What a great opportunity to finally learn how to make my own bias tape. I ran over to Jo-Ann fabrics to pick up a 1/2" bias tape maker (which just happened to be on sale for 50% off!). The Clover bias tape makers are supposed to be the best, so I bought the 2 sizes they had in stock. There are a bunch of online tutorials for making bias tape. I opted to use this one which shows how to make a continuous strip of bias tape.


While at Jo-Ann's I noticed they had Gutermann thread on sale for 40% off. I picked up some of their decorative metallic threads. This tunic is going to be rather plain and I want to add some pizzazz with fancy threads and decorative stitching. Here is the neckline. My shirt has its own jewelry!


I applied the decorative stitching using the Kenmore 1914 and one of its design cams. I will add the same design to the cuffs and hem. As you can see in the first picture, this fabric is very thin. I like to leave some things (like my lumpy body) to the imagination. I will be adding a lining to this top, even though the pattern does not call for one. This is how far I have gotten. Now back to work.


Tuesday, July 9, 2013

Free LIMERICK HAT Pattern

I am offering this pattern for individual use, only. Please do not use this pattern in any way, to make a profit, unless you have my consent.
Limerick Hat
by Roxi Willoughby

Experience Level: Advanced
Sizes: teen/adult

Materials:
300 yards worsted weight yarn
Size 6 straight or circular needles
Size 8 straight or circular needles
Size 8 double pointed needles
Cable needle
Circular ring marker
Darning needle

Gauge: 10 sts/14 rows=2” in St st using smaller needles. Your row gauge is more important, in this pattern, than your stitch gauge.

Special Instructions:
C6F: Transfer next 3 sts to cable needle and hold them in front of work. Knit next 3 sts. Knit 3 sts from cable needle.
C6B: Transfer next 3 sts to cable needle and hold them in back of work. Knit next 3 sts. Knit 3 sts from cable needle.
W&T: Move working yarn to opposite side of work (if you are knitting move the yarn to the front and if you are purling move the yarn to the back), slip the next st to the right needle, again move the yarn to the opposite side of work (if you are knitting move the yarn to the back and if you are purling move the yarn to the front), return the slipped st to the left needle and turn your work.
K next st tog with wrap: From front of work (the knit side), insert tip of right needle into the wrap and the stitch at the same time, sliding sts onto right needle. Transfer both the wrap and st to the left needle and knit them together.
P next st tog with wrap: From the back of work (the knit side), insert the tip of the right needle into the wrap and pull it up onto the left needle. Purl it together with the st it was wrapped around.
NOTE: When knitting the brim and cabled band of this hat, you will be slipping the first st of each row purl-wise, and knitting the last st. This will create a nice edge that looks similar to a crocheted chain. This edge will make it easier to see where to sew when assembling your hat. It will also make it easier to pick up the sts for the crown.

Brim
With smaller straight or circular needles, CO 30 sts.
Row 1: P.
Row 2 (W&T row): Sl 1 pw, k22, W&T, p16, W&T, k16, k next st tog with wrap, k6.
Row 3: Sl 1 pw, p22, p next st tog with wrap, p5, k1.
Row 4: Sl 1 pw, k to end of row.
Row 5: Sl 1 pw, p to 1 st from end of row, k1.
Repeat rows 2 thru 5, until you've worked 35 W&T rows. If you turn the brim to the wrong side, you'll be able to see the little bumps where you've work the W&T. This makes it easy to count. You should end up with 35 of those rows. BO. With RS together, and holding the CO and BO edges together, sew the back brim seam. Set the brim aside.

Cabled Band
With larger straight or circular needles, CO 28 sts.
Row 1 & all odd rows: Sl 1 pw, p to last st, k1.
Row 2: Sl 1 pw, k to end of row.
Row 4 (first cable row): Sl 1 pw, k1, C6F, k6, C6F, k8.
Rows 6 & 8: Sl 1 pw, k to end of row.
Row 10 (second cable row): Sl 1 pw, k7, C6B, k6, C6B, k2.
Rows 12 & 14: Sl 1 pw, k to end of row.
Work rows 4 thru 15 until you've worked 13 of each of the cable rows.
Then work rows 4 thru 13. BO. With RS together, and holding the CO and BO edges together, sew the back cabled band seam.

Hat Crown
With dpns, pick up 84 sts along one edge of the cabled band.
Rnd 1: K, placing a st marker at the beginning of round.
Rnd 2: (K12, k2tog) repeat around.
Rnd 3: K
Rnd 4: (K11, k2tog) repeat around.
Rnd 5: K
Rnd 6: (K10, k2tog) repeat around.
Rnd 7: (K9, k2tog) repeat around.
Continue decreasing in this manner, knitting one less st before the dec each rnd, until 12 sts remain.
Next rnd: K2tog around. Break yarn, leaving 8". Using a tapestry needle thread yarn through remaining 6 sts. Pull tightly and fasten off.

Finishing: With RS tog, sew opposite edge of the cabled band to one edge of the brim. The cabled band is slightly wider so you'll need to ease it onto the band evenly. Fold the band in half, WS tog, and whip stitch it over the inside seam. Weave in ends.

ABBREVIATION KEY:
BO = bind off
CO = cast on
Dec = decrease
Dpn = double point needles
K = knit
K2tog = knit 2 stitches together                                                      
P = purl
Rnd = round
RS = right side(s)                                
Sl 1 pw = At the beginning of every row, with the yarn in front of work, slip one st, move yarn to back.
St(s) = stitch(es)
St st = stockinette stitch  
Tog = together
WS = wrong side(s)
           
Copyright November 2008 - Lamb’s Ear Designs. All Rights Reserved.
Please respect our copyright. Thank you.