Wednesday, March 20, 2013

Busy With Bees....Now Some Sewing

Sorry I have been so quiet. I have been scrambling trying to figure out the best course of action to take for my bees this spring. Since discovering the varroa mites I have applied 2 applications of HopGuard, 9 days apart. I was shooting for 7 or 8 days but the weather didn't cooperate. I figure as long as it was somewhere between 7 and 10 days I'll be fine. I will apply one last dose in another week. The screened bottom boards with varroa trap drawers have been ordered, along with nine 8 frame shallow supers. I recently sold one of my spinning wheels so now have the funds to order up the rest of my bee supplies for the year, to include frames and foundation for my new shallow supers, a pollen trap, and a third screened bottom board to use for the new hive I plan to start from a split off the Carniolans. They have proven much gentler than my Italians plus they didn't have the awful dysentery issues that the Italians did. I want to keep those genetics going. Now that things have settled down with the bee girls I had some free time to sew my son's birthday pajama pants. True, his birthday was February 24th. Here they are, better late than never.


A close-up of the mock fly.

It isn't easy to find pajama flannel designed for grown-up guys. This son has always loved spicy food so the jalapeno print is very appropriate. I think PJ bottoms will be my go-to gift from now on. They are quick, easy, and useful. Once I have the pattern tailored to the individual I can sew a pair in a day. Next pair will be for my husband. He's put in his request.

Sunday, March 10, 2013

Varroa Destructor Mites

I have finally seen my first Varroa mites, up close and very personal. Because of my recent outbreak of Nosema in my Italian hive I began to suspect the hive was weakened by something. Quite possible Varroa  I hadn't seen evidence of mites for the first 2 years of beekeeping. However it is usually in the 3rd year that colonies run into trouble. That has been the case for my hives. I determined I would dose both hives with HopGuard just to be safe. I also planned to apply more Fumagilin B to both hives. Yesterday I finally got a day I felt was nice enough to make a full inspection of my hives. The plan was to determine if they were queen right, look for mites, take them all the way down to the bottom boards so I could remove dead bees and debris, manipulate the boxes to place empty boxes on top, insert pollen patties, HopQuard and place top feeders with a gallon of medicated syrup in each hive.

I broke into the Italians first since they were the ones I am most worried about. Things look better than I expected. There are lots of bees. They still have quite a bit of honey left which tells me I guestimated correctly by leaving them a box and a half of honey for the winter. No risk of starvation. In spite of the dysentery problem the colony came through the winter in terrific condition. This colony was already down in the bottom 2 boxes. I found some uncapped larva and feel confident the queen is doing her thing. Once I find the brood nest and see baby bees it is my philosophy to not disturb the brood nest further. I don't need to see the queen and don't want to risk damaging her. I placed an empty box on top of the brood nest and the box of honey on top of that. Then the feeder. Before reassembling the hive I removed the bottom board, scraped it off (lots of dead bees and bee poop) then hosed it off with water to rinse off the poop. This hive was not too upset...until I added the HopGuard strips. Then they went berserk. Once the hive was reassembled they settled down quickly and went about business as usual.

On to the Carniolans. They were much more easy going. I repeated the process with their hive. Their bottom board had dead bees and debris but no bee poop. It got a scraping and rinsing, too. This hive likes to build burr comb and drone comb on the tops of the frames. I am actually glad they did because it was while scraping this off the frames (unfortunately killing many drone babes) that I noticed my first varroa. They prefer drone larva so that is often where you first notice them. Imagine having a cat on your shoulder. Now imagine that same cat constantly biting you and sucking your blood. That is what a varroa mite is like to a bee. Look, that one poor drone larva had 2 cats on him.


The HopGuard will help with this mite infestation. Sadly mites are going to be a problem for bees and beekeepers for a long time. HopGuard is considered a soft chemical and is acceptable for use in organic beekeeping. It does not hurt the bees in any way. I will also be using thyme oil in my bee feeders. Apparently mites are repulsed by the flavor of thyme. The nurse bees feed the thyme infused syrup to the baby bees and then they aren't as tasty to the mites.

My hives are now ready for the spring. They are already bringing in loads of pollen on the nice days. I will have to reapply the HopGuard in 3 weeks. That gives the current batch of bee babies time to hatch out so that the HopGuard can be used on their mites, too.

Things are looking very good for my hives. I think I will be getting lots of honey this year.

Sunday, March 3, 2013

First Really Nice Day of 2013

Today it definitely feels like spring. The sky is sunny and the bees are out flying like crazy. The sky above my house is filled with happy bees coming and going. Some are visiting my community feeder but most are heading out to feast on the blooms in the surrounding area. I opened up the entrance reducers last night to make it easier for them to get in and out. No more bottle neck at the front door. I just shot this video of the Carniolan hive. You can almost hear them giggling with glee.


I tried to zoom in so you could see all the pollen they are bringing in but the picture got fuzzy so I zoomed back out. Tomorrow, if the weather stays nice, I plan to go into the Italian hive to clean it out, make sure it is queenright and put on a medicated top feeder. Their numbers just aren't what I would expect and I need to make sure it is because they've been sick and not because they are queenless.

Saturday, March 2, 2013

Let The Blooming Begin!

It seems spring is springing already. The crocus are blooming and the daffodils and chives are poking up through the earth. Yesterday I noticed my bees were a little more active than they had been. Not only were they visiting the community feeder in my back yard but many of them were heading off, up, up and away. There were many, many bees crowding the front of the hive waiting for their turn to enter because I have the entrance reduced way down for the winter. I knew immediately what this renewed activity meant. Something was blooming. But what? I went for a short walk in my neighborhood and I did not need to go more than 100 feet before I found some likely suspects.


I am not positive but I think those are Pieris. They were in the front yards of 2 neighboring homes. I know what these are. Heathers. They were down on the corner of 48th and Pacific.


And I'll be darned if this doesn't look like a Chestnut tree, but it seems awfully early for that so I'm not sure what it is.


In any event my girls are on the job and bringing in pollen. And where there's pollen, there's nectar. The bees are finding forage. The following pictures are of different bees from my Carniolan hive. They seem to be collecting mostly deep gold pollen which means they are mainly visiting the same plants.


All except these girls, who are carting in some lemon yellow pollen. The rebels.


The Italian bees are bringing in pollen, too, but it is mainly the lemon yellow stuff. This is a very encouraging sign. Pollen in the hive means food for baby bees.

Motorectomy & Head Transplant

Bet you didn't know I was a surgeon. Heck, I haven't even been to medical school. Actually this was minor surgery and the patient is alive and well. I have been planning this operation for months. I was just waiting for a suitable head to come my way. My plan was to insert a modern electric sewing machine into a treadle cabinet. Singers are the easiest and most plentiful options. Old Singer treadle cabinets are a dime a dozen. If you are patient you can find one in good condition for a reasonable price. I paid $100 for this 5 drawer Singer cabinet with a coffin case. It held a Singer 127 with Sphinx decals. I also own a Singer 66 red eye and a 28k hand crank. I really didn't need another treadle machine and especially not one with a vibrating shuttle. I determined I would find a Singer 237 to convert over to foot power. Not all electric machines can be converted to a treadle. The best candidates have an external belt driven motor and a short side deck that won't interfere with a drive belt. Yesterday I picked this little lovely up at the Goodwill for $30.


It came in a ratty looking case and needed a cleaning but otherwise looked to be in excellent condition. A perfect candidate for my proposed surgery. Note the short side deck located just under the hand wheel. Plenty of room for a treadle belt. First things first. I needed to clean it, lube it and make sure it worked. The only problem people run into with the 237's is cracked bobbin case covers. It is the only plastic part on the underside of the machine. Mine is not cracked but I think it may have a few rough spots in the opening where the needle enters to access the bobbin. I'll worry about smoothing those out later.


Someone had been a bit overzealous with the oil can on the underside of the machine. Actually I would rather it was over oiled than too dry. If the metal doesn't have a light coat of oil it is more apt to rust when folks store their old, unloved machines in a damp garage or shed. The main problem I've run into with over oiled machines is that the oil can harden into a varnish-like substance and freeze up the machine. This is usually remedied by going over the metal parts with a hot hair dryer. Don't try that on plastic parts, though. I sopped up the excess oil, hit it all with a hair dryer, then re-oiled the moving parts lightly. The bobbin case wasn't very dirty. Just needed a little oil. I scrubbed the feed dogs with a bit of oil on an old toothbrush and reassembled and closed up the machine bottom.


Now on to the upper mechanisms. The top of the machine was clean and rather devoid of oil which was surprising given the state of the underside.


Again I went over it with the hair dryer to loosen up any hardened oil and then oiled the moving bits. The only parts of a sewing machine that require actual grease are any gears (or some potted motors). Upon closer inspection I did spy a gear under the zig zag selector assembly.


It had some old grease already present but I added a touch of my favorite white lithium for good measure. The area under the face plate that houses the presser foot and needle bars was also very clean. Just needed a little oiling.


I closed everything up and threaded the machine in preparation for testing. The motor was strong and the machine did what it was supposed to. I had to file off some burrs from one of the thread guides where the chrome plating was coming off, and loosen the bobbin tension but those were minor things.


Now it was time for the fun part. Removing the motor and light. Each are held on by a separate screw.


That's all there is to it. Once the screws are removed those pieces come right off and you can remove the rubber belt. Easy peasy.


Now the machine is free of those restrictions and ready for a simpler life. Electricity? We don't need no stinkin' electricity.


This is the cabinet donor waiting patiently for the beheading. Sorry Sphinx, but you have to make way for the new(er) kid. You can see by the date etched into the motor from the 237  that it is circa 1969. Not all that new but the Singer 127 is from 1892.


The Sphinx came out of the cabinet easily. It just slid up off the mounting pegs. I then had to remove the drip pan so that the 237 would have enough room depthwise. Otherwise it fit like a glove.


I had to shorten up the leather drive belt. I place clothespins on the ends so they can't slip down through the holes. I then loosened up one end of the large staple, cut the belt shorter, used a safety pin to make a new hole through the end of the leather belt, inserted the opened end of the staple through the new hole and used pliers to clamp it back down. Here is the 237 all cleaned and ready to rumble.


I made a couple of videos to show how nicely it works. The first one is rather shaky because I have a hard time holding a camera and operating a treadle machine. But you get the idea.


This second one shows the superior piercing power of the treadled 237. Here it is sewing through 8 layers of denim. I'm not sure how well it would do that if the electric motor was attached. You'll note I got wise and sat the camera down this time.


And that is how you can convert an electric machine to foot power. It only takes a few minutes.

Friday, March 1, 2013

Lekala 8004 (FREE Pattern)

This is my first wearable muslin. For those non-sewists a muslin is a trial run at a pattern. You sew it up in a fabric you don't mind wasting in order to see how it works before you cut into your nice, expensive fabric. With woven garments most muslins are made from muslin, hence the name. But knit muslins need to be made from a knit fabric, preferably with a similar stretch and drape to the intended fashion fabric. This is how my first wearable muslin (as the name implies it is a muslin you can also wear) came into being.

I was cruising around a sewing board on Ravely and happened upon a lady's version of a Star Trek top. Being a long time Trekkie I was immediately interested. Come to find out she got the pattern from an online Russian pattern company, Lekala. This company provides custom pattern PDF's specifically tailored to your unique measurements. How awesome is that? And the patterns are inexpensive. Some are even free (like this top pattern). I was intrigued and set about sewing one up immediately to see if the fit was all it was cracked up to be. I downloaded 8004 and began piecing it together so I could trace it off onto freezer paper.


I immediately ran into a snag. every 3rd page of my pattern printed incorrectly. I am sure it is an issue with my printer but I was able to cobble things together enough to use by adjusting some cutting lines like the one below.


I cut out the fabric pieces and pinned them to Mama Smurf. Things looked pretty good so I pressed on.


Before I started sewing the top together I used an over edge stitch to finish the edges. No, I still have not made friends with my serger. That will take some time and I am too impatient. Must get sewing!


I hemmed the front neck edges, joined those to the midriff and sewed the shoulder seams. I used some clear elastic to stabilize the shoulder seams. I learned that trick from the Craftsy Sewing with Knits class. It was worth the price of admission just for that.


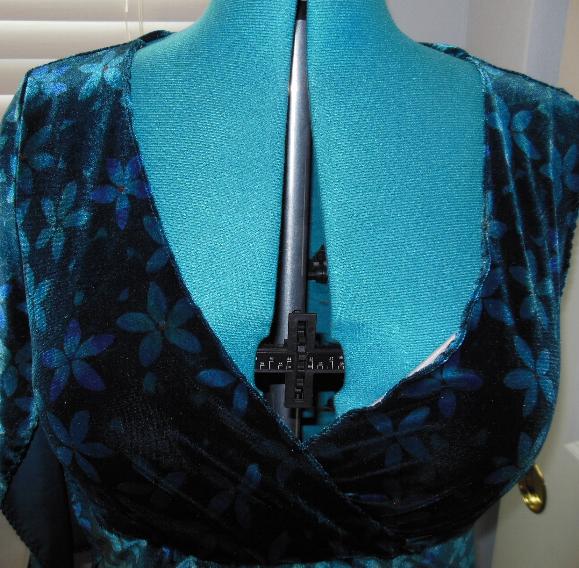
Hmmm, once the front and back were joined it was apparent I had another problem to address. The front neck opening was droopy.


 Because this piece is cut on the bias it really needs some stabilizing. I could remove the top stitching and redo it but my old eyes can not see the top stitching thread when it is hidden in the fluff of the velveteen fabric. I thought about it and came up with this quick fix. I rummaged in my stash and found some elastic thread. I ran that along the underside of the neck edge hem, catching it in the over edge stitches.


It is not seen from the wrong side of the garment.
(pardon the fuzzy photo)


I had to be careful not to snug the elastic thread too tightly or the edge rolled to the outside. Here you can see how the elastic thread fixed the problem. The left side has the fix, the right side does not. huge difference.


Onwards and upwards. It was now clear that this top would be wearable. Uh oh, another issue. You see there is a problem with this fabric which is why I was willing to sacrifice it to a muslin. The color is gorgeous, the drape nice, the hand soft...what could be wrong? Ugly red dots. 


These make no sense. Why would the fabric designer ruin a perfectly good fabric? It looks like someone had an accident with glitter nail polish. I wanted to cover them up, but how? I purchased some black sequins and sewed them over the offensive dots. All better.


I sewed the rest of the top together and checked the fit. It fits better than most store bought tops I've had. There was just one more hurdle to clear. I had never hemmed a knit fabric before and was worried after that saggy neckline fiasco. I planned to use a twin needle with woolly nylon in the bobbin but I needed some type of stabilizer to keep the edge from stretching and to prevent skipped stitches. I experimented with some Stitch Witchery I had in my stash. The label claimed it did not impede the stretch of knits. And it didn't. I was going for teeny hems so cut the Stitch Witchery in half lengthwise and ironed it in place.


I then used the double needle to sew a hem that looks similar to a professional cover stitch found on purchased knitwear. As long as I sewed on top of the stabilizer I had no skipped stitches. I am thrilled and this will be my go to hem for knits. I think I will also try using the Stitch Witchery to stabilize the neck edges on my next version of this top. My friend, Lennea, gave me some lovely wine colored crushed velvet knit that will be perfect.


So here it is, my finished Lekala 8004. I love it and will wear it proudly! The only change I made was to give it 3/4 sleeves. In Roxi's closet most tops and dresses will have 3/4 sleeves. I adore them.