Showing posts with label Pajamas. Show all posts

Wednesday, March 20, 2013

Busy With Bees....Now Some Sewing

Sorry I have been so quiet. I have been scrambling trying to figure out the best course of action to take for my bees this spring. Since discovering the varroa mites I have applied 2 applications of HopGuard, 9 days apart. I was shooting for 7 or 8 days but the weather didn't cooperate. I figure as long as it was somewhere between 7 and 10 days I'll be fine. I will apply one last dose in another week. The screened bottom boards with varroa trap drawers have been ordered, along with nine 8 frame shallow supers. I recently sold one of my spinning wheels so now have the funds to order up the rest of my bee supplies for the year, to include frames and foundation for my new shallow supers, a pollen trap, and a third screened bottom board to use for the new hive I plan to start from a split off the Carniolans. They have proven much gentler than my Italians plus they didn't have the awful dysentery issues that the Italians did. I want to keep those genetics going. Now that things have settled down with the bee girls I had some free time to sew my son's birthday pajama pants. True, his birthday was February 24th. Here they are, better late than never.


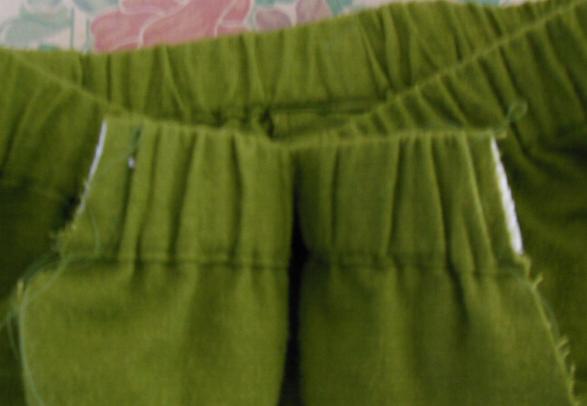
A close-up of the mock fly.

It isn't easy to find pajama flannel designed for grown-up guys. This son has always loved spicy food so the jalapeno print is very appropriate. I think PJ bottoms will be my go-to gift from now on. They are quick, easy, and useful. Once I have the pattern tailored to the individual I can sew a pair in a day. Next pair will be for my husband. He's put in his request.

Monday, February 11, 2013

Errol's Pajamas Are Finished

That is one owed Christmas present I can cross off the list. Here are the finished pajama pants. I doubt I'll be able to get him to model them so this will have to do.


I sure hope they fit. I had to guess at the elastic. Errol is so skinny, I'm sure they'll be fine. Here is a close-up of the mock fly detail, complete with button.


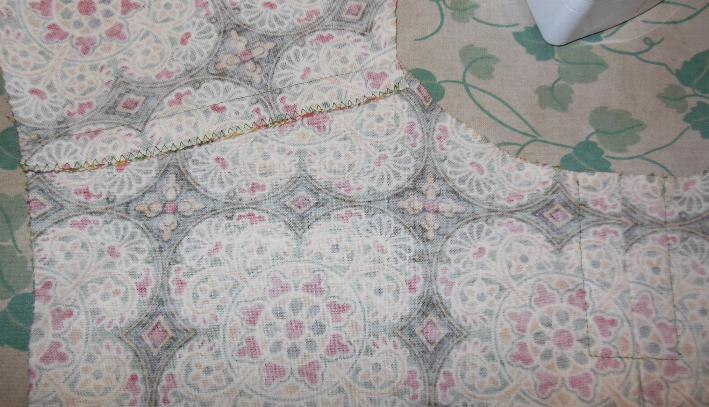
Pj pants sew up really quickly. Here is a picture of one of the pockets. I used a solid color on the inside front of the pocket.


I had barely  enough thread. This was a brand new spool when I started. I need to remember not to buy such tiny spools.


Children First

I am itching to begin a new sewing project for ME...but first I need to sew up the 3 Christmas gifts I owe. They won't take long. Just 3 fleece hoodies and a pair of PJ bottoms. Still, I am dragging my feet. Today I decided to get started on Errol's PJ's since they will be the more difficult (and interesting) of the 3 projects. He doesn't know it but his PJ bottoms will be an experiment. I want to see if I can accurately shorten both the crotch and leg lengths. That was my main unhappiness with this pattern when I made a pair for myself. I took Errol's measurements to determine what size to sew for him. Extra Small which was no surprise. He is a little guy. I also took his inseam measurement (28") and am using that to adjust the leg length. Once I altered the tissue pattern I transferred the correct size markings over to my parchment paper. You can see below that the paper wasn't quite wide enough and I had to splice a bit onto the crotch corner (lower right).


And here are the pieces all cut out and ready to sew. I adore this flannel print. It's a camping theme with little camper trailers. So cute!


Tuesday, October 23, 2012

Jammies: Part Eight (we have buttonholes!)

Today I was determined to finally finish these dang pajamas. All they needed were the buttonholes and buttons. How hard could that be? I planned on using my Bernina to make some simple buttonholes using the built in buttonholer. There was just one problem. It makes gawd-awful buttonholes. No matter how many times I tried.


After all this work I am not going to settle for ugly buttonholes. Not gonna happen. I have quite a few machines with almost as many buttonhole makers. The machine I was most familiar with was the dreaded Singer Touch & Throw (Touch & Sew). I drug it out and set it up on top of one of the sewing cabinets. Then I spent about 30 minutes trying to locate the manual and the feed dog cover plate. If you've ever had the misfortune of glancing into my sewing room you will understand why this was not an easy task. I finally located them, in the last place I looked. Armed with the sewing machine manual, the buttonhole attachment, and the manual for the attachment, I set to work learning how to use all of these to make some decent buttonholes.


Singer did not let me down. The manuals were very clear and the attachment worked great. I experimented with a few practice buttonholes until I got it just right. Buttonholes are a #$@*^ to rip out so you want to make sure things will go well before you attempt one on your actual project.


Fingers crossed and here we go. OMG! It's a real, honest to goodness buttonhole. One that I don't have to be ashamed of.


The buttonhole cams work like magic. I did go around it twice to make sure it is strong. I am quite pleased with the results. Even the backs look nice.


Once I had made all 5 of the buttonholes I carefully used my seam ripper to open them up.


I had already determined, when making my practice holes, that this was the proper size to fit my buttons.


I suppose the buttonholes could have been a bit straighter but I am still pleased with the results. Not bad for a first attempt. I now have a comfy new pair of pajamas and I'll be wearing them to bed tonight.


There are a few things I will alter for the next pair. The waistband is too high so I will shorten that by 2". The legs are a bit long so I will shorten those by another inch. And the armhole is too big and will be made 1" smaller next time. Sewing is so magical. You take big rectangles of fabric and a paper pattern....


...and turn them into something warm and useful. I am anxious to make some more pairs but first I need to sew some things for Christmas gifts. In the meantime I will also be learning how to use my serger. November is going to be a very busy month but I still hope to get some sewing accomplished. We shall see.

Friday, October 19, 2012

Jammies: Part Seven (The Home Stretch)

The pants are almost finished. Here is the front with the false fly and the pockets attached.


   Then the instructions had me sew the backs to the fronts (without sewing the center back seam) and make the casing for the elastic. The pattern called for 1.25" wide elastic which necessitated a visit to JoAnn's. Once I had elastic of the required width I set about inserting it into the casing. Not an easy task. The elastic barely fit. 1" elastic would've been a better choice. I first employed my trusty bodkin. It made it about a third of the way through the casing then refused to budge. It finally let go of the elastic altogether. When I removed it from the casing I found it was a bit mangled. Thank goodness I was a cloth diapering kind of mama (back when cloth diapering wasn't cool) and had saved some of the diaper pins.They are the best thing ever for moving stubborn elastic through tight casings. 


   Once the elastic was in place the directions advised me to sew up the center back seam and tack the elastic seam to one side. Are they kidding me? After all the lovely attention to detail on the shirt and pants they end the project with a sloppy back seam and a big lump of elastic right in the middle of your back? 


That's not going to be comfortable. Today I will remove the stitching from the first and last few inches of the casing, sew the center back seam, resew the casing leaving a small opening at the back, pull the ends of elastic out through that opening, lap the elastic edges and sew them together, poke the elastic ends back into the casing and sew the small opening closed.  That will leave just the inner leg seams and hemming and the pants will be finished.

Saturday, October 13, 2012

Jammies: Part Six (Sleeves & Hem)

   Yesterday I installed the sleeves and sewed the side seams. This morning I added the sleeve cuffs and hemmed the shirt bottom. I wanted to show you these pictures before I attempt the buttonholes. Just in case. I am really nervous about those. It's been a long, long time.


   Not too shabby for a first attempt. The sleeve caps are a little on the deep side so I may shorten those by an inch or so on the next version. I am also unhappy with the crooked print on the fronts. I knew going into the project that I wasn't going to bother trying to match the designs (although it didn't turn out too far off) but I should've checked the fronts to make sure the hem was going to be lined up with the print. Oh well, it's a pajama top. The sandman won't care. I did guess-timate the length correctly. The sleeve length is perfect. The free arm on the Bernina came in handy for sewing the cuffs.


Cute side vent detail.

   Now all that's left are the buttonholes and the buttons. I even found the perfect green buttons in my stash, left over from my knitting days. Pardon the glare from the flash. The button in the top right corner is the true color.


Friday, October 12, 2012

Jammies: Part 5 (The Collar)

   The collar has proved to be a toughie. Partly because I haven't done much sewing in 2 decades, and partly because the pattern instructions leave a lot to be desired. Yesterday things were going along swimmingly. I installed the box pleat, sewed the shoulder seams, then set to work on the collar.


   This is where I ran into a brick wall. I needed to baste a seam allowance onto one of the collar pieces, then pin the trim on so that the raw edge was lined up with the seam line and sew the trim in place with a 1/4" seam. But I don't have a 1/4" foot for the Bernina, and with the collar covering the needle plate I couldn't see my usual mark (the edge of the feed dogs). I tried to guess at it but failed miserably. I would show you a picture of that first mangled collar but it is too humiliated to pose. What to do? In order for the collar to turn out properly I needed precision. I decided to step away from the project and think about it. This morning I was ready to tackle it again. It had to work this time. I am running out of fabric. I opted to baste a 1/4" seam line onto the trim then pin it to the collar and stitch along the basting line. Success!

Much better! 
This one actually looks like a collar.


   One more scary seam to go. This one will involve sewing the collar to the shirt, sewing the front facings in place and installing bias binding over the back seam. The potential for many things to go horribly wrong.


   This called for pins. Lots and lots of them. Again, success! I even remembered to add one of my hippi chic labels before I top stitched the bias binding in place.


   Even though the written directions are questionable I am really loving this pajama pattern. There are some really nice design details like the contrasting trim, box pleat and bias binding.

   I almost forgot to mention, my new serger arrived. I'll show pictures once I get a chance to play with it. I am determined to finish these PJ's first. It's cold at night.